
Tips for Staying Safe While Shopping Online: Essential Strategies for Secure Transactions
Online shopping offers convenience and variety, but it comes with risks that savvy shoppers must navigate. To stay safe while shopping online, it is crucial to use reputable websites, keep personal information secure, and remain vigilant against potential scams. Understanding these elements can make a significant difference in a shopper’s experience and security.
Many people underestimate the importance of website security indicators, such as HTTPS and familiar payment options. Recognizing these signs can help in identifying trustworthy platforms. Additionally, he or she should regularly monitor bank statements and alerts to spot any unauthorized transactions quickly.
Staying safe while shopping online also involves being cautious about public Wi-Fi, which can expose sensitive information to cybercriminals. By maintaining good digital hygiene and being informed, shoppers can enjoy their online experiences while minimizing risks.
Essential Online Shopping Safety Practices
Staying safe while shopping online involves several essential practices. By following these guidelines, individuals can protect themselves from cybercriminals and ensure a secure shopping experience.
Choose Reputable Retailers
Selecting trusted and well-known retailers is crucial. Established brands often have clear return policies, customer service options, and secure payment methods. Consumers should research unfamiliar websites by checking reviews on trusted platforms.
Using comparison engines can help individuals identify credible sellers. They should be wary of sites that appear too good to be true or lack customer feedback. Platforms like the Federal Trade Commission (FTC) provide resources to identify fake shops and counterfeit goods. Always prioritize buying from authorized dealers to avoid scams.
Verify Secure Websites (HTTPS)
Ensuring that a website uses HTTPS is a vital step in safe online shopping. Websites secured with HTTPS encrypt data, making it difficult for cybercriminals to intercept sensitive information. Before making a purchase, look for a padlock icon next to the URL in the address bar.
If a website lacks HTTPS, it poses significant risks, especially for financial transactions. Transactions on unsecured websites can expose personal and payment data to fraud. Shopping on secure sites reduces the likelihood of data breaches and enhances privacy.
Avoid Public Wi‑Fi for Transactions
Using public Wi-Fi for online shopping increases vulnerability to cyber threats. Public networks often lack security measures, making it easy for hackers to access personal information. It is advisable to conduct transactions only on private, secure networks.
For increased security, individuals can use a Virtual Private Network (VPN) while on public Wi-Fi. A VPN encrypts internet connections, providing an extra layer of protection. When away from home, using mobile data instead of Wi-Fi can also help minimize security risks during online shopping.
Inspect Website Authenticity
Before making a purchase, checking a website’s authenticity is essential. Individuals should look for contact information, including phone numbers and addresses. Trustworthy sites usually provide clear, accessible customer service.
Online shoppers can also research a company’s reputation. Reading reviews and checking for secure payment options can help verify authenticity. If a site shows signs of phishing or has poor design quality, it’s best to avoid it. Adopting these measures can help ensure a safer online shopping experience.
Strengthening Your Digital Security
To enhance online safety, individuals should focus on maintaining updated devices and software, using effective protection tools, implementing strong passwords, and activating two-factor authentication. These strategies significantly reduce the risk of security breaches.
Keep Devices and Software Updated
Keeping devices and software updated is crucial for effective digital security. Updates often contain patches that fix vulnerabilities, making it more difficult for hackers to exploit.
He or she should enable automatic updates whenever possible. This ensures that the latest security improvements are applied without manual intervention. Moreover, regularly checking for updates manually can also safeguard against missed vulnerabilities.
Operating systems, browsers, and applications should be prioritized. He or she should pay attention to urgent updates, especially those related to security.
Use Antivirus and Anti-Malware Protection
Utilizing antivirus and anti-malware protection helps in detecting and removing malicious software. These tools can identify threats before they compromise sensitive information.
He or she should opt for reputable antivirus software with real-time scanning features. Regular scans can catch threats that might evade initial detection.
It’s important to keep the antivirus software updated as new malware types emerge frequently. Additionally, users should periodically review scan results to ensure thorough protection.
Create Strong and Unique Passwords
Creating strong and unique passwords is essential in protecting online accounts. Weak passwords are easily guessed and can lead to unauthorized access.
He or she should use a combination of letters, numbers, and special characters, aiming for at least 12 characters. Avoiding personal information makes passwords harder to crack.
Using a password manager can streamline the process of creating and storing complex passwords. This tool securely saves each password, ensuring he or she use unique passwords across different sites.
Enable Two-Factor Authentication
Enabling two-factor authentication (2FA) adds an additional layer of security. With 2FA, users must provide a second form of verification, making it more challenging for unauthorized users to access accounts.
He or she should activate 2FA wherever possible, particularly for sensitive accounts like email and banking. This method often involves receiving a code on a mobile device, which must be entered alongside the password.
Regularly reviewing account security settings, including 2FA options, ensures that all possible security measures are in place. This proactive step significantly mitigates the risks of identity theft and unauthorized access.
Smart Payment and Privacy Strategies
Implementing smart payment options and privacy strategies is essential for safe online shopping. By choosing secure payment methods and understanding policies, shoppers can significantly reduce their risk of fraud and data breaches.
Prefer Credit Cards and Payment Services
Using credit cards for online transactions offers several advantages. Credit cards often come with fraud protection, allowing users to dispute unauthorized charges. Popular payment services like PayPal, Apple Pay, and Google Pay act as an extra layer of security by masking the user’s card information.
These services facilitate payments without sharing sensitive data directly with merchants. It is advisable to avoid using debit cards, as they may not offer the same level of protection against theft. Shoppers should always ensure that the checkout page is secured with HTTPS before entering any payment information.
Safeguard Personal and Financial Information
Protecting personal and financial information is critical in online shopping. It is essential to ensure that websites have clear and accessible privacy policies explaining how data will be used and stored. Shoppers should only buy from reputable retailers with positive reviews and verified contact information.
Using strong, unique passwords for each account can help prevent identity theft. Additionally, shoppers may consider enabling two-factor authentication where available, adding another layer of security to their accounts. Avoid sharing unnecessary personal information, such as social security numbers, on shopping sites.
Review Return and Privacy Policies
Before making a purchase, reviewing return and privacy policies is crucial. Understanding the return policy can help avoid complications in case an item is unsatisfactory or defective. Retailers should provide clear information on how to initiate a return, including time frames and any associated costs.
Privacy policies are the backbone of data protection while shopping. Shoppers should check how their data will be used and whether it may be shared with third parties. Clear policies indicate a trustworthy retailer, contributing to a safer online shopping experience.
Recognizing and Avoiding Online Threats
Staying vigilant while shopping online is crucial in today’s digital landscape. Recognizing potential online threats helps consumers protect their personal information and financial security. The following points address common threats and how to sidestep them.
Spotting Email and Phishing Scams
Many online scams begin with deceptive emails. Phishing emails often mimic legitimate brands, urging users to click on malicious links. Identifiable features include:
- Generic Greetings: Emails lacking a personal salutation can be a red flag.
- Suspicious URLs: Hovering over links reveals the actual destination. Mismatched URLs should raise concern.
- Urgent Language: Phrases prompting immediate action often indicate a scam.
Consumers should verify emails by visiting the company’s official website directly. Reporting suspicious emails to the Better Business Bureau can help others avoid similar threats.
Evaluating Social Media Ads and Fake Reviews
Social media platforms are common grounds for scams and misleading advertisements. Users should critically assess ads by checking for:
- Verified Accounts: Ensure the account is authenticated to reduce the risk of fraud.
- Quality of Content: Poorly designed ads may signal a scam.
- Review Patterns: An abundance of overly positive or negative reviews may indicate manipulation.
Fake reviews can impact purchasing decisions. It is advisable to consult customer testimonials on reputable review sites like Trustpilot or the Better Business Bureau before proceeding with any purchases.
Awareness During Peak Shopping Events
Sales events such as Black Friday or Cyber Monday attract numerous online shoppers, making them prime times for scams. Awareness is essential during these periods. Key tactics to stay safe include:
- Researching Retailers: Prior to making a purchase, verify the legitimacy of the website.
- Using Secure Payment Methods: Opt for payment services that offer buyer protection.
- Monitoring Accounts: Regularly checking bank statements can help detect fraudulent charges quickly.
By remaining cautious during busy shopping times, shoppers can enjoy significant discounts without falling prey to online scams.
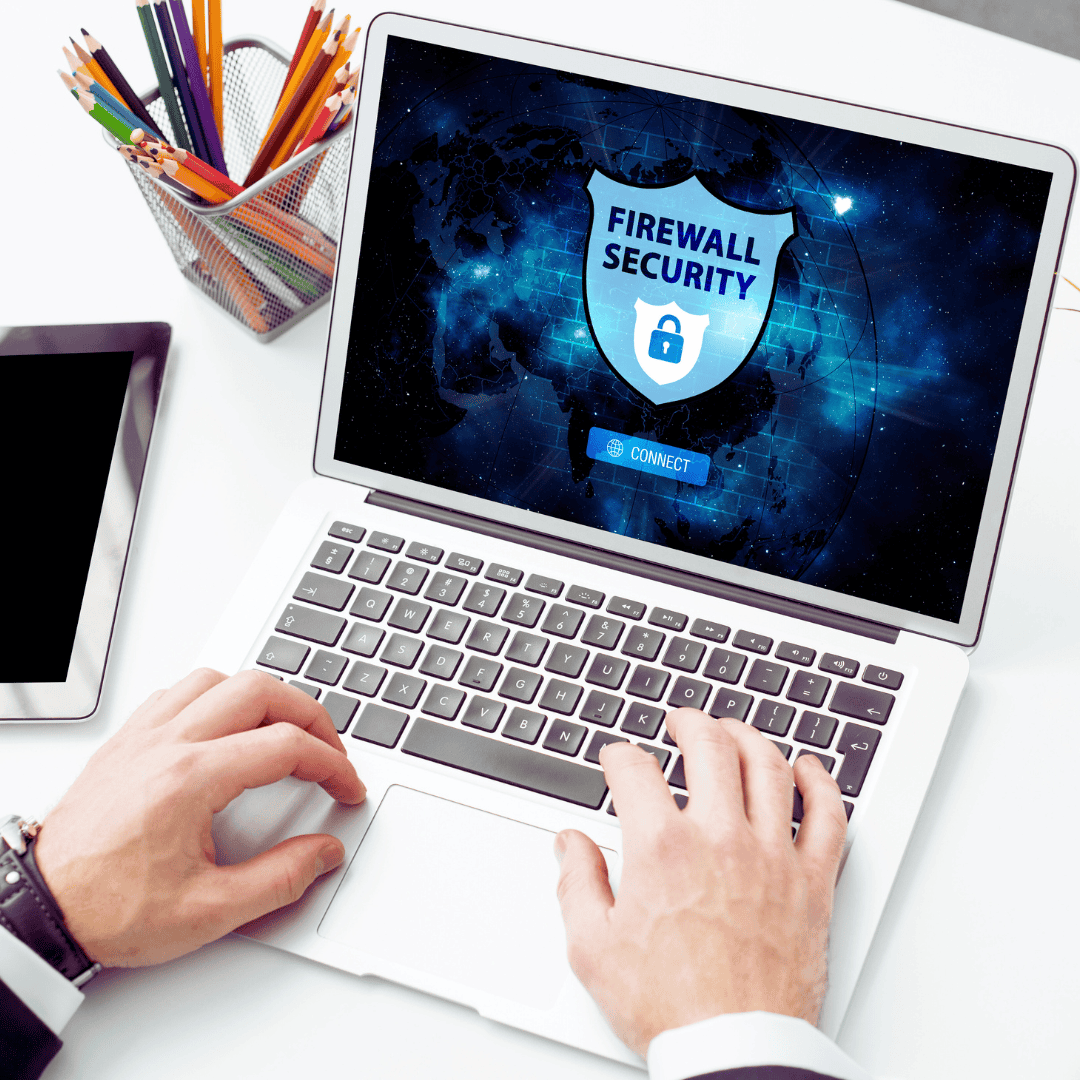
What is a Firewall and Why It Matters for Your Security: A Comprehensive Overview
A firewall serves as a critical barrier between a user’s internal network and external threats. It monitors and controls incoming and outgoing network traffic based on predetermined security rules, making it essential for safeguarding sensitive information. Without a firewall, systems become more vulnerable to unauthorized access and cyberattacks, leading to potential data breaches.
Understanding the role of a firewall is vital for anyone concerned about online security. Firewalls can be hardware-based or software-based, each providing different layers of protection. By enforcing security policies and managing data traffic, they reduce the risk of malicious activities that could compromise personal or organizational data.
Investing in a reliable firewall solution can significantly enhance the overall security posture. It not only acts as the first line of defense but also helps in monitoring network activity. With escalating cyber threats, acknowledging the importance of firewalls is more relevant now than ever.
What Is a Firewall and Its Role in Cybersecurity
Firewalls are essential components in the realm of cybersecurity, providing a barrier between trusted internal networks and untrusted external entities. Understanding their definition, comparing them with antivirus software, and recognizing their position in network architecture can help emphasize their critical role in network security.
Definition and Purpose
A firewall is a network security device designed to monitor and control incoming and outgoing traffic based on predetermined security rules. Its primary purpose is to establish a protective wall around a network, allowing only authorized users and traffic through while blocking malicious activity.
Firewalls can be hardware-based, software-based, or a combination of both. Hardware firewalls are typically placed between a computer network and the internet, while software firewalls run on individual devices. They work by filtering traffic through defined rules, inspecting data packets, and taking action based on their content, direction, or source.
Firewall Versus Antivirus Software
Although both firewalls and antivirus software play pivotal roles in cybersecurity, they serve different functions. A firewall primarily focuses on controlling network traffic, whereas antivirus software aims to detect and remove malware from devices.
Firewalls act as the first line of defense, blocking unauthorized access attempts while allowing legitimate communication. Antivirus software, on the other hand, scans files and programs for known malware signatures and behavioral patterns. Combining both tools enhances security, as they address different aspects of network protection.
Position in Network Architecture
In network architecture, firewalls are strategically placed to safeguard networks from external threats. They are typically positioned at the network perimeter, serving as a barrier between the internal network and the internet.
Modern network architectures often utilize multiple firewalls in layered security strategies. This approach includes perimeter firewalls, internal firewalls, and host-based firewalls. By segmenting the network and applying different security policies, organizations can effectively manage risks and enhance their overall security posture.
How Firewalls Work
Firewalls function as a barrier between a trusted network and untrusted networks, managing and controlling network traffic. They protect systems from unauthorized access while allowing legitimate communication.
Network Traffic Filtering
Firewalls analyze incoming and outgoing network traffic based on predetermined security rules. By filtering data packets, they can identify and block malicious traffic. The effectiveness of this filtering determines the overall security of a network.
Typically, firewalls examine various data attributes, such as source and destination IP addresses, ports, and protocols. Depending on the rules set by the organization, specific traffic is allowed or denied entry to the network. This process prevents potential exploitation and contains threats before they reach critical resources.
Packet Filtering Techniques
Packet filtering is a fundamental firewall process that inspects packets for compliance with established rules. The primary goal is to allow or deny packets based on pre-defined criteria.
There are several techniques used in packet filtering:
- Static Packet Filtering: Evaluates packets in isolation without considering their context in a session.
- Dynamic Packet Filtering: Monitors traffic flow and can adapt based on the connection state, enhancing security.
By applying these techniques, firewalls can swiftly drop malicious packets and maintain the integrity of network resources.
Stateful Inspection
Stateful inspection is a more advanced technique in firewalls that tracks active connections. It allows firewalls to determine the state of traffic, ensuring that only legitimate packets related to established sessions are allowed through.
Unlike simple packet filtering, stateful inspection maintains records of each session, providing a comprehensive view of the connection’s state. It can differentiate between packets belonging to legitimate connections and unauthorized attempts. This approach enhances security by preventing attacks like packet spoofing.
Access Control Lists
Access control lists (ACLs) are critical in defining what traffic is permitted or denied by a firewall. ACLs utilize a set of rules that specify conditions for allowing or blocking traffic.
These rules are usually based on:
- IP addresses: Identifying specific devices or networks.
- Protocols: Allowing or denying traffic based on protocol type (e.g., TCP, UDP).
- Ports: Restricting access to certain services or applications.
By managing ACLs effectively, organizations can tailor their firewall settings to specific security needs, helping to mitigate risks associated with unauthorized access and data breaches.
Types of Firewalls and Key Technologies
Firewalls come in different forms and utilize various technologies to protect networks. Understanding these types helps in choosing the right solution for security needs.
Hardware Firewall
A hardware firewall is a physical device that acts as a barrier between a network and external threats. It is typically placed at the network’s perimeter. These firewalls can filter traffic based on preset rules and settings.
Many hardware firewalls support features like intrusion detection and deep packet inspection. These features allow the firewall to analyze the content of packets crossing the network, enhancing security. They can also handle multiple connections, making them suitable for businesses with significant traffic.
Hardware firewalls often offer a user-friendly interface for configuration and management. This accessibility can be crucial for IT teams aiming for effective security without excessive complexity.
Software Firewall
A software firewall operates at the device level, installed directly on an individual computer or server. This type provides protection tailored to each device and can monitor outgoing and incoming traffic.
Software firewalls often come with firewall software that features customizable settings. Users can set rules for which applications are allowed to send or receive data. This level of detail makes software firewalls adaptable to specific user needs and behaviors.
While less robust than hardware firewalls for extensive networks, software firewalls are essential for protecting individual devices from malware and viruses. They serve as a first line of defense against local threats.
Proxy Firewalls
Proxy firewalls act as intermediaries between users and the Internet. When a user requests data, the request goes through the proxy firewall, which then fetches the information and passes it back to the user. This process helps to mask the user’s IP address, adding a layer of anonymity.
These firewalls can perform content filtering and provide enhanced security through traffic logging and monitoring. Administrators can use this data to identify unusual patterns or potentially harmful traffic.
Proxy firewalls are particularly effective for application control. They can restrict access to certain websites or applications based on the organization’s policies. This feature is beneficial in corporate environments focusing on productivity and security.
Next-Generation Firewalls (NGFW)
Next-Generation Firewalls (NGFW) integrate traditional firewall capabilities with advanced features like application awareness and deep packet inspection. This technology allows them to detect and respond to threats at a much deeper level compared to traditional firewalls.
NGFWs provide extensive security options, including integrated intrusion prevention systems (IPS) and threat intelligence. These capabilities enable them to identify and block sophisticated attacks and malware that could evade traditional firewalls.
The ability to enforce security policies at the application layer gives NGFWs a significant advantage. This allows for fine-tuned control over network traffic, improving overall security and compliance in environments where data protection is critical.
Why Firewalls Matter for Security and Best Practices
Firewalls serve as essential barriers to protect networks from unauthorized access and cyber threats. They enforce security protocols and help establish robust defense mechanisms, preventing critical data breaches and enhancing overall system integrity.
Protection Against Unauthorized Access
Firewalls are designed to limit unauthorized access to a network. By controlling incoming and outgoing traffic based on predetermined security rules, they shield sensitive information from unwanted users.
Access control lists (ACLs) can specify which devices or users are allowed to enter the network. This is vital because unauthorized access can lead to compromised systems and data leaks. Regularly updating and configuring firewall settings ensures the protection measures remain effective against evolving threats.
Using strong passwords and multi-factor authentication further enhances this protection. When combined with firewalls, these practices create a more robust shield against unauthorized access attempts.
Mitigating Cyber Threats and Data Breaches
Cyber threats, including malware and phishing attacks, pose constant dangers to information security. Firewalls play a crucial role in mitigating these risks by blocking harmful traffic and monitoring suspicious activities.
They can identify known malware signatures and filter out malicious content before it reaches the system. By analyzing data packets, firewalls can detect unusual patterns that may indicate an ongoing attack, allowing for timely responses.
Implementing regular security patches is also essential. Many cyber attacks exploit vulnerabilities in software, and a well-configured firewall can help protect against these, especially when paired with updated security measures.
Intrusion Prevention Systems and Threat Detection
Intrusion Prevention Systems (IPS) work alongside firewalls to enhance security protocols. They provide deeper inspection of data packets, actively identifying and blocking potential threats.
IPS can recognize abnormal behaviors indicative of an attack, such as repeated access attempts from the same IP address. This proactive approach minimizes risks of data breaches and enables rapid incident response.
Integrating IPS with firewalls creates a multi-layered defense strategy. This combination not only improves threat detection but also strengthens overall network security by ensuring multiple barriers against intrusions.
Implementing Strong Security Policies
Establishing strong security policies is vital for maximizing the effectiveness of firewalls. These policies outline acceptable usage and define roles for users within the network, setting clear expectations for security behavior.
Regular training sessions about cybersecurity awareness can empower users to recognize and avoid potential threats. Employees should understand the importance of adhering to security protocols, such as using strong passwords and reporting any suspicious activity.
Periodic audits of security policies ensure they remain relevant and effective as technology and threats evolve. A comprehensive approach to security policy implementation complements firewall functions and elevates network protection levels.

What to Do When Your Computer Won’t Start: Essential Troubleshooting Steps
A computer that won’t start can be a frustrating experience. It may be due to simple issues like a loose power cable or something more complex like hardware failure. Identifying the specific cause is crucial for resolving the problem effectively.
Users often overlook basic troubleshooting steps, such as checking the power source or ensuring that peripherals are disconnected. These small actions can sometimes lead to immediate solutions.
If these initial checks do not resolve the issue, more in-depth troubleshooting may be necessary. Understanding how to diagnose the problem systematically will guide users toward a resolution, whether it involves software issues or hardware repairs.
Essential First Steps: Initial Troubleshooting When Your Computer Won’t Start
When faced with a computer that refuses to start, it’s crucial to follow a systematic approach. Checking power sources and connections, verifying the functionality of buttons, and using the correct power equipment are the first steps to diagnose the problem effectively.
Check Power Source and Cables
First, ensure that the computer is connected to a working power source. Verify that the power outlet is functional by plugging in another device. If the outlet works, examine the power cable and ensure it is properly connected to both the wall and the computer. Look for any visible damage along the cable or at the connectors.
If using a desktop, check the power supply unit (PSU) switch, typically located at the back. This switch must be in the “On” position. For laptops, confirm that the AC adapter is firmly attached and the charging light is illuminated. If there is still no power, try a different power outlet or cable to eliminate the possibility of a faulty connection.
Test Power Button and Reset Button
Next, inspect the power button. Sometimes, a stuck or malfunctioning power button can prevent the computer from starting. Press the power button firmly, holding it for at least five seconds to initiate a hard reset. This action can help if the device is unresponsive.
In addition to the power button, check the reset button if available. This button can be useful for forcing a reboot in certain situations. If a desktop computer does not respond, removing the side panel and directly connecting the power switch to the motherboard could help determine if the button is the issue.
Use a Correct Power Strip or Surge Protector
If the computer is plugged into a power strip or surge protector, ensure that it is functioning properly. Look for any reset buttons on the strip and test them if necessary. Also, check if the strip itself is turned on, as some models include a power switch.
It is essential to use a surge protector that meets the required specifications for the computer. A faulty surge protector can lead to intermittent power issues. If unsure, bypass the power strip altogether by plugging the computer directly into the wall outlet to determine if that resolves the issue.
Diagnosing Hardware Issues Preventing Startup
Diagnosing hardware issues is essential when a computer fails to start. Identifying specific components that may be malfunctioning can help in efficiently troubleshooting the problem.
Examine Internal Components and Connections
The first step is to open the computer case and visually inspect the internal components. Look for loose, disconnected, or damaged cables. Power supply connections to the motherboard and other components must be secure.
Check that hard drives, SSDs, and NVMe drives are properly seated in their respective slots. Any disk that is not connected securely can prevent the system from booting.
While examining internal components, also ensure that the motherboard’s power cables are firmly attached. This includes both the main power connector and the CPU power connector.
Inspect Motherboard, RAM, and CPU
Next, assess the motherboard, RAM, and CPU for potential issues. Check for visible damage on the motherboard, such as burnt traces or physical cracks.
If there are no visible issues, reseat the RAM modules by removing them and then reinserting them to ensure a solid connection. This can resolve problems caused by poor contact.
Ensure that the CPU is correctly installed with an adequate amount of thermal paste. If the paste has dried out or is improperly applied, it can lead to overheating issues.
Identify Graphics Card or Display Problems
A malfunctioning graphics card can also prevent startup. If a computer has a dedicated graphics card, it should be checked next. Ensure that it is properly seated in its PCIe slot and that any required power connectors are attached.
If the system does not boot but the fans spin, it may indicate an issue with the graphics card or display. Connecting the monitor to another computer or using a different monitor can help isolate the problem.
Checking for any signs of physical damage on the graphics card, such as burnt components, is also crucial. If the card shows signs of damage, it may need replacement.
Detect Signs of Overheating and Physical Damage
Overheating can significantly affect the performance of a computer and prevent it from starting. Look for dust accumulation in fans and heatsinks, as this can restrict airflow.
Clean out any dust and ensure that fans are operational. If the internal temperature exceeds safe levels, the system may shut down to avoid damage.
Inspect physical components for signs of bulging capacitors or burned circuits. These can indicate serious failure and may require replacement.
Regular maintenance, such as checking thermal paste and ensuring proper airflow, can help prevent overheating issues.
Resolving Boot and Software Issues
Addressing boot and software issues requires a structured approach. The process involves modifying BIOS settings, troubleshooting boot sequences for different operating systems, utilizing Safe Mode for diagnostics, and repairing system files.
Access and Configure BIOS or UEFI Settings
Accessing BIOS or UEFI is the first step in resolving boot issues. Restart the computer and press the appropriate key—often Del, F2, or Esc—during startup.
Once in the BIOS or UEFI interface, users should verify the boot sequence. Ensure that the primary hard drive is set as the first boot option to avoid boot failures. If using a bootable USB drive, adjust the settings to prioritize USB access.
Additional settings like enabling Secure Boot and Legacy Mode can also impact system startup. Adjust these based on the OS being used, whether it is Windows, Linux, or Mac.
Troubleshoot Windows, Linux, or Mac Boot Sequences
Each operating system has specific boot processes. For Windows, startup failures can often be fixed through Windows Recovery Environment (WinRE). It typically provides options like “Startup Repair” or “System Restore.”
On Linux systems, users can investigate the GRUB bootloader settings or use recovery modes. For a Mac, holding Command + R at startup accesses recovery mode, allowing users to run Disk Utility for repairs.
If the boot manager doesn’t appear, check for hardware connections. Loose cables or failing components can lead to boot issues across all operating systems.
Utilize Safe Mode and Windows Recovery Environment
Safe Mode is a critical diagnostic tool for Windows. Users can boot into Safe Mode by pressing F8 or holding Shift while selecting Restart. This mode starts Windows with minimal drivers, helping identify software conflicts.
In Windows 10, users can access the Windows Recovery Environment to launch Safe Mode or perform Automatic Repairs. Options such as “Reset this PC” allow users to keep their files or remove everything, depending on the severity of the issues.
For Mac, pressing Shift during startup enables Safe Boot, which performs checks on startup items and file integrity.
Repair System Files and Restore Previous States
Repairing system files often resolves persistent boot problems. Windows users can run the command sfc /scannow from the Command Prompt to scan and repair corrupted files.
Mac users can use Disk Utility to run First Aid, checking for issues with the disk. Linux systems benefit from commands like fsck to identify and repair filesystem errors.
If issues persist, performing a System Restore can revert the computer to a previous functional state. Users can select restore points through the recovery environment, providing a means to recover from problematic updates or changes.
These steps facilitate the systematic resolution of boot and software issues, allowing users to regain access to their systems effectively.
Advanced Solutions and When to Seek Help
If the basic troubleshooting steps are ineffective, more advanced solutions may be necessary. This can involve checking hardware connections, ensuring system security, or considering professional help.
Remove External Devices and Peripherals
External devices like printers, USB drives, or gaming controllers can disrupt the booting process. To identify the cause, disconnect all peripherals and attempt to restart the computer.
If the computer starts, reconnect each device one at a time. This process helps pinpoint faulty hardware.
In some cases, damaged cables or incompatible devices may impede startup. If it doesn’t start after removing peripherals, further investigation into internal hardware might be warranted.
Check for Malware and Security Threats
Malware infections can prevent a computer from starting correctly. Utilizing a dedicated antivirus or anti-malware software can diagnose issues when the OS is functional.
If the computer fails to boot, accessing Safe Mode or using a bootable USB drive with security tools can allow scanning for viruses. This is crucial as undetected malware can cause long-term damage.
Awareness of websites or downloads that historically pose risks is necessary. Regular system scans are a proactive approach to prevent security threats.
Consider Professional Repair or Replacement
When self-troubleshooting yields no results, seeking professional repair may become essential. They can assess and identify complex issues that an average user may overlook.
Limitations in technical knowledge may hinder self-repair, especially in cases of hardware damage. Professionals possess the tools and experience to assess problems accurately, particularly with more intricate systems.
If the computer is older, weighing the cost of repairs against the potential benefits of a replacement is key. Upgrading could provide improved performance and security features aligned with current technologies.